Ginger Chicken
This post may contain affiliate links. Please read my disclosure policy.
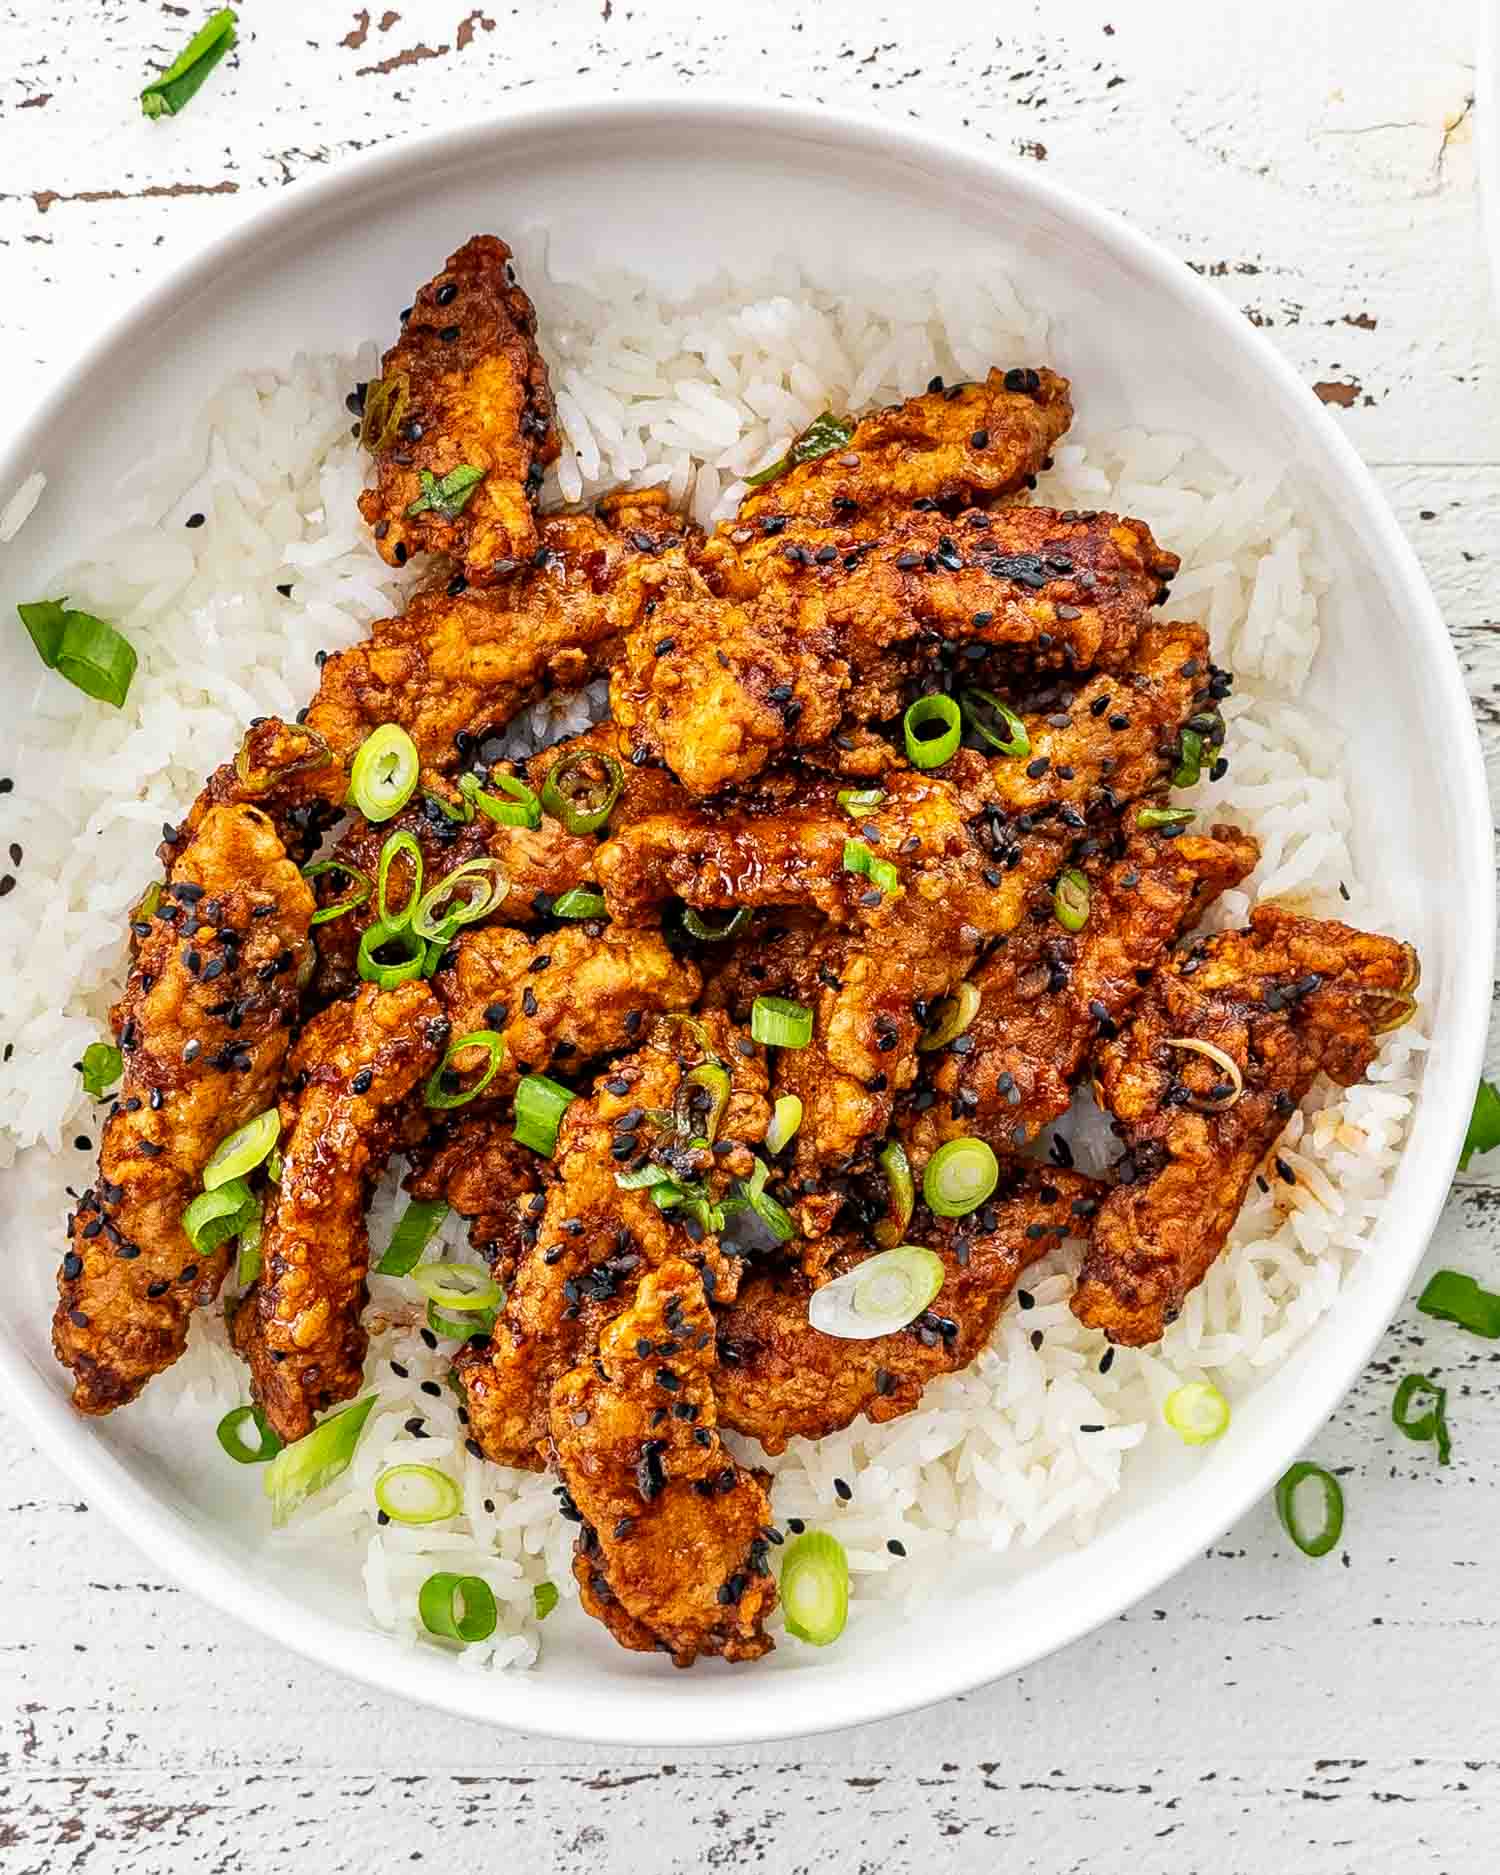
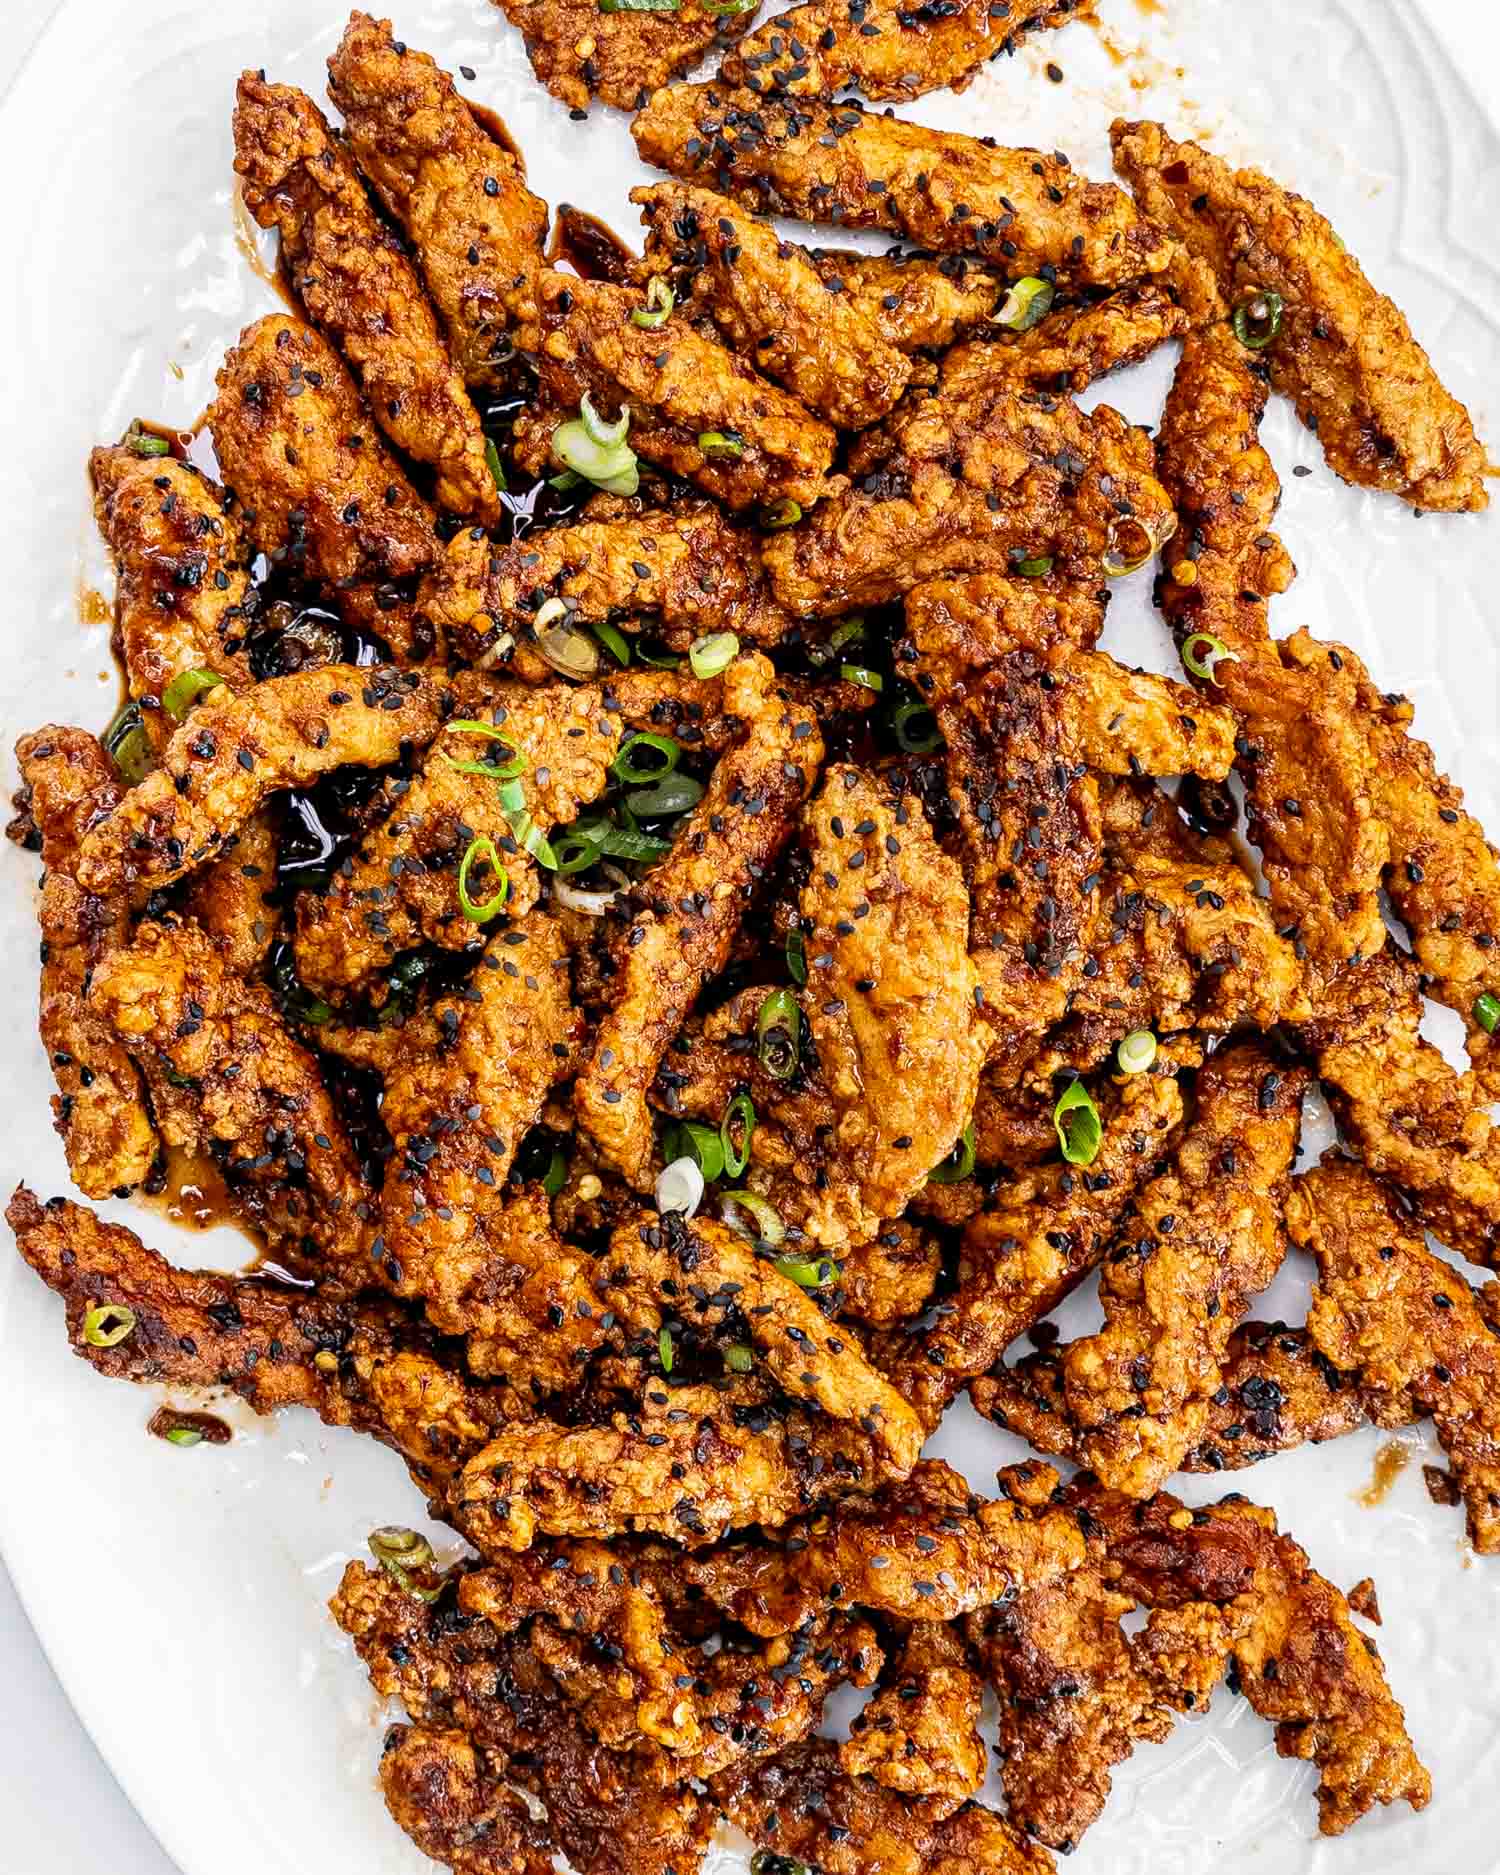
Picture golden, crispy chicken strips, tender and juicy on the inside, enrobed in a sauce that’s the epitome of sweet-spicy perfection—welcome to the world of my Ginger Chicken. Every bite of this heavenly dish is a journey through layers of flavor, offering a gourmet experience that beckons the senses and captivates the palate.
Spice up your dinner with Ginger Chicken
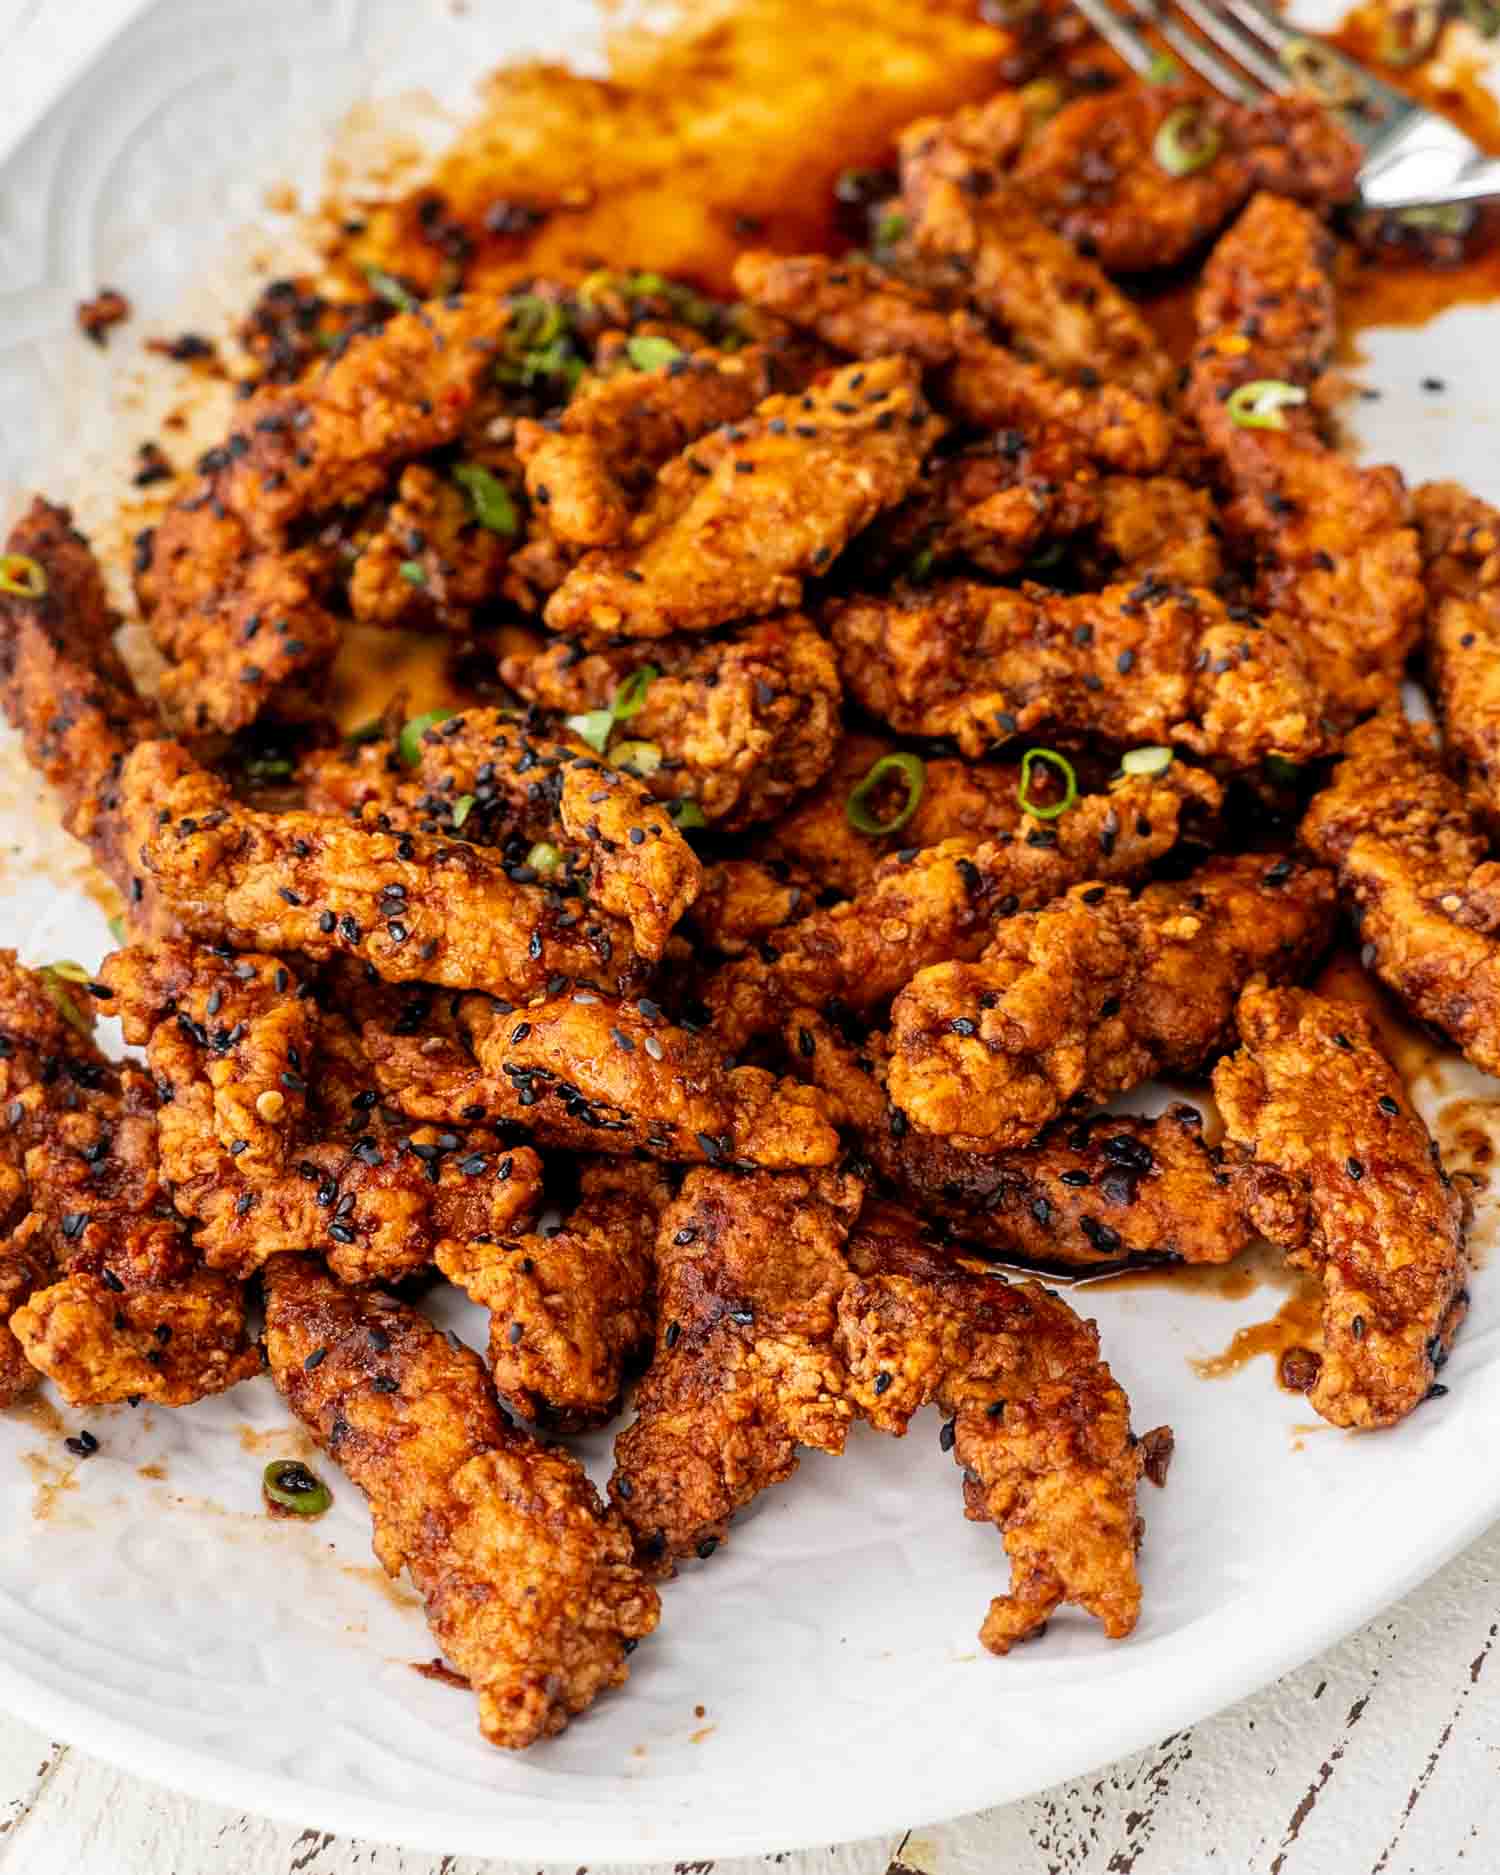
Experience a flavor explosion with this Ginger Chicken, a dish that beautifully marries crispiness with a spicy, sweet, and tangy sauce. Each piece of chicken, meticulously coated and fried until golden, is a bite of crunchy delight, revealing juicy, flavorful tenderness with subtle whispers of smoked paprika and ginger.
The sauce is where fiery meets sweet; a dazzling mixture of honey and sriracha, it envelops the crispy chicken, whispering sweet, spicy secrets with every bite. A dash of soy sauce and fresh ginger adds a zesty twist, elevating the dish to a whole new level of deliciousness, while the garnish of sesame seeds and green onions provide the final touch of elegance and flavor.
Why You’ll Love This Ginger Chicken
- Super Tasty: This ginger chicken is really yummy! It’s got a mix of sweet, spicy, and salty flavors that make every bite super exciting. It’s a hit for anyone who loves food with lots of flavors!
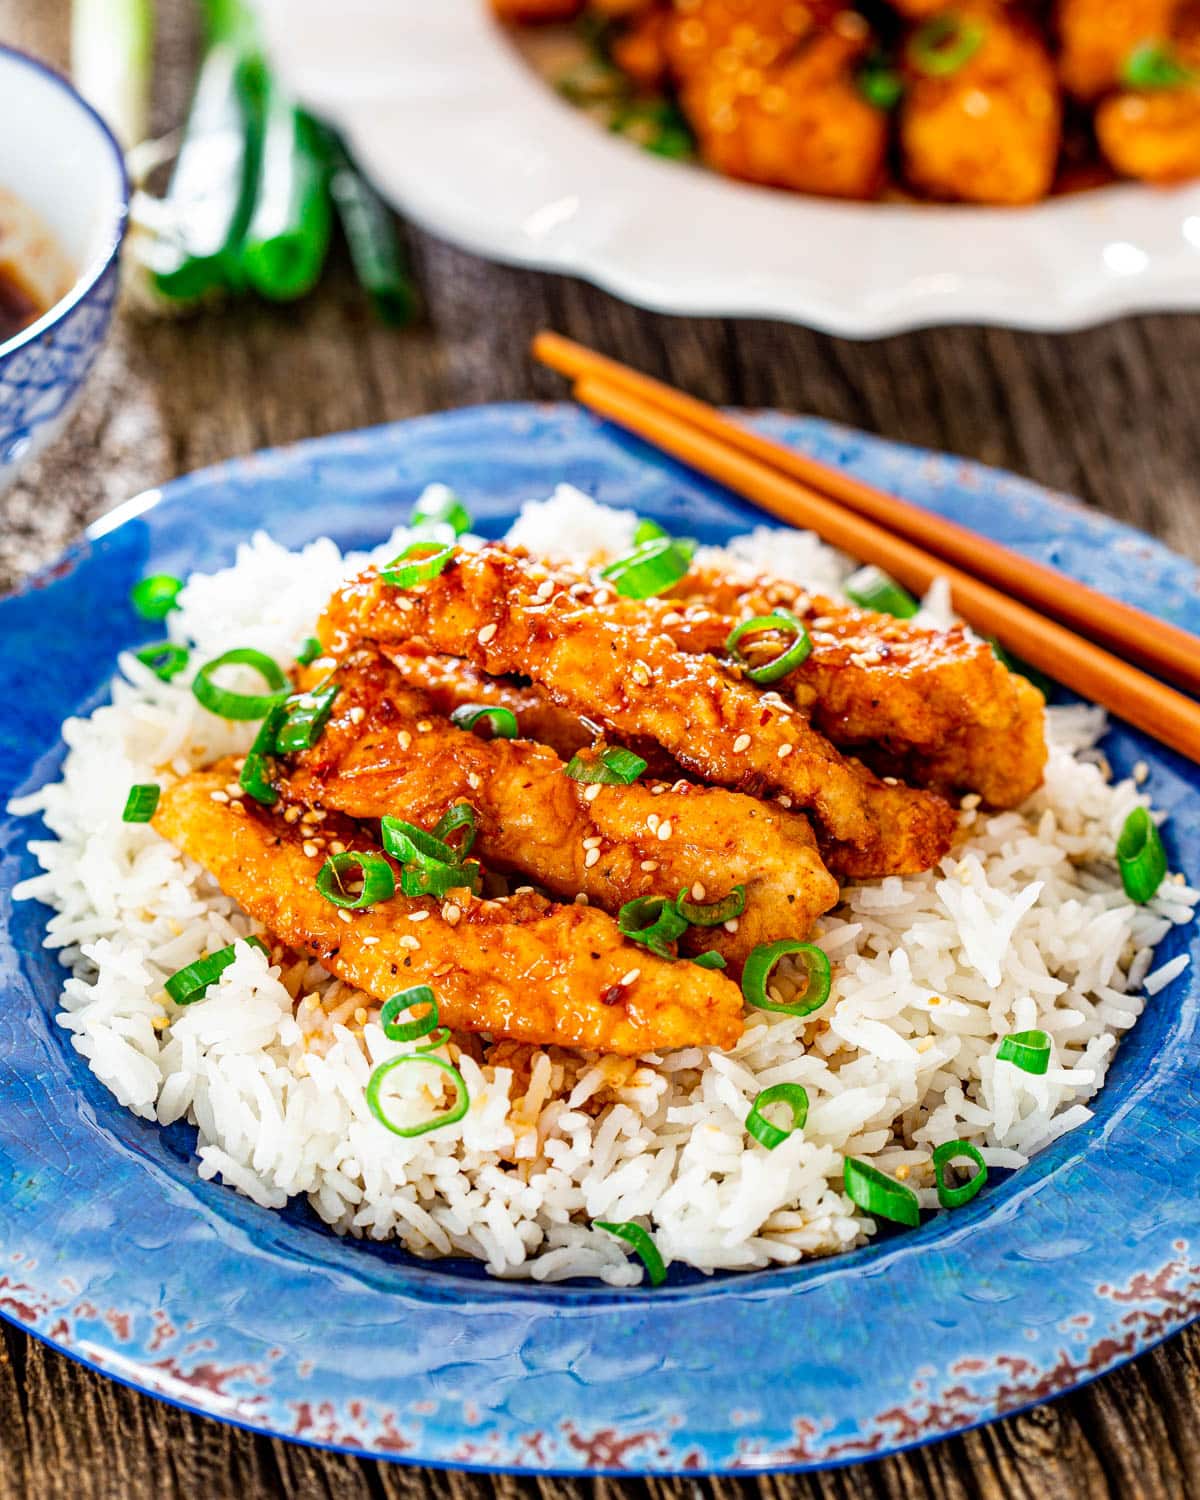
- Easy to Make: People love this recipe because it’s simple and easy to make. It’s great for anyone, no matter how good you are at cooking. Plus, it goes well with lots of different sides like rice, noodles, or veggies, so it’s easy to make it just the way you like it!
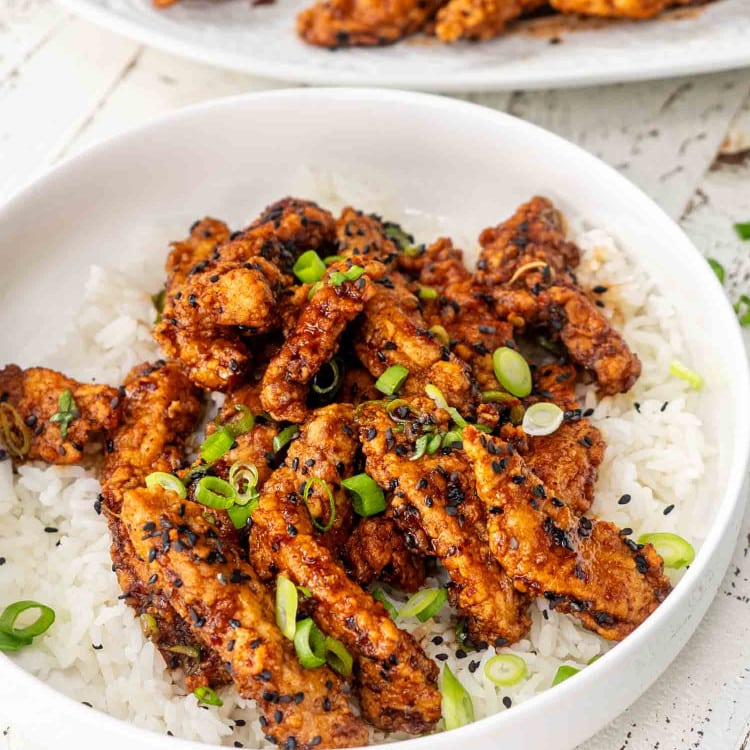
- Crunchy and Juicy: The chicken is crispy on the outside and juicy on the inside, which is a really satisfying combo. The little crunch from sesame seeds and the fresh taste of green onions make it even better. It looks good, and it tastes even better!
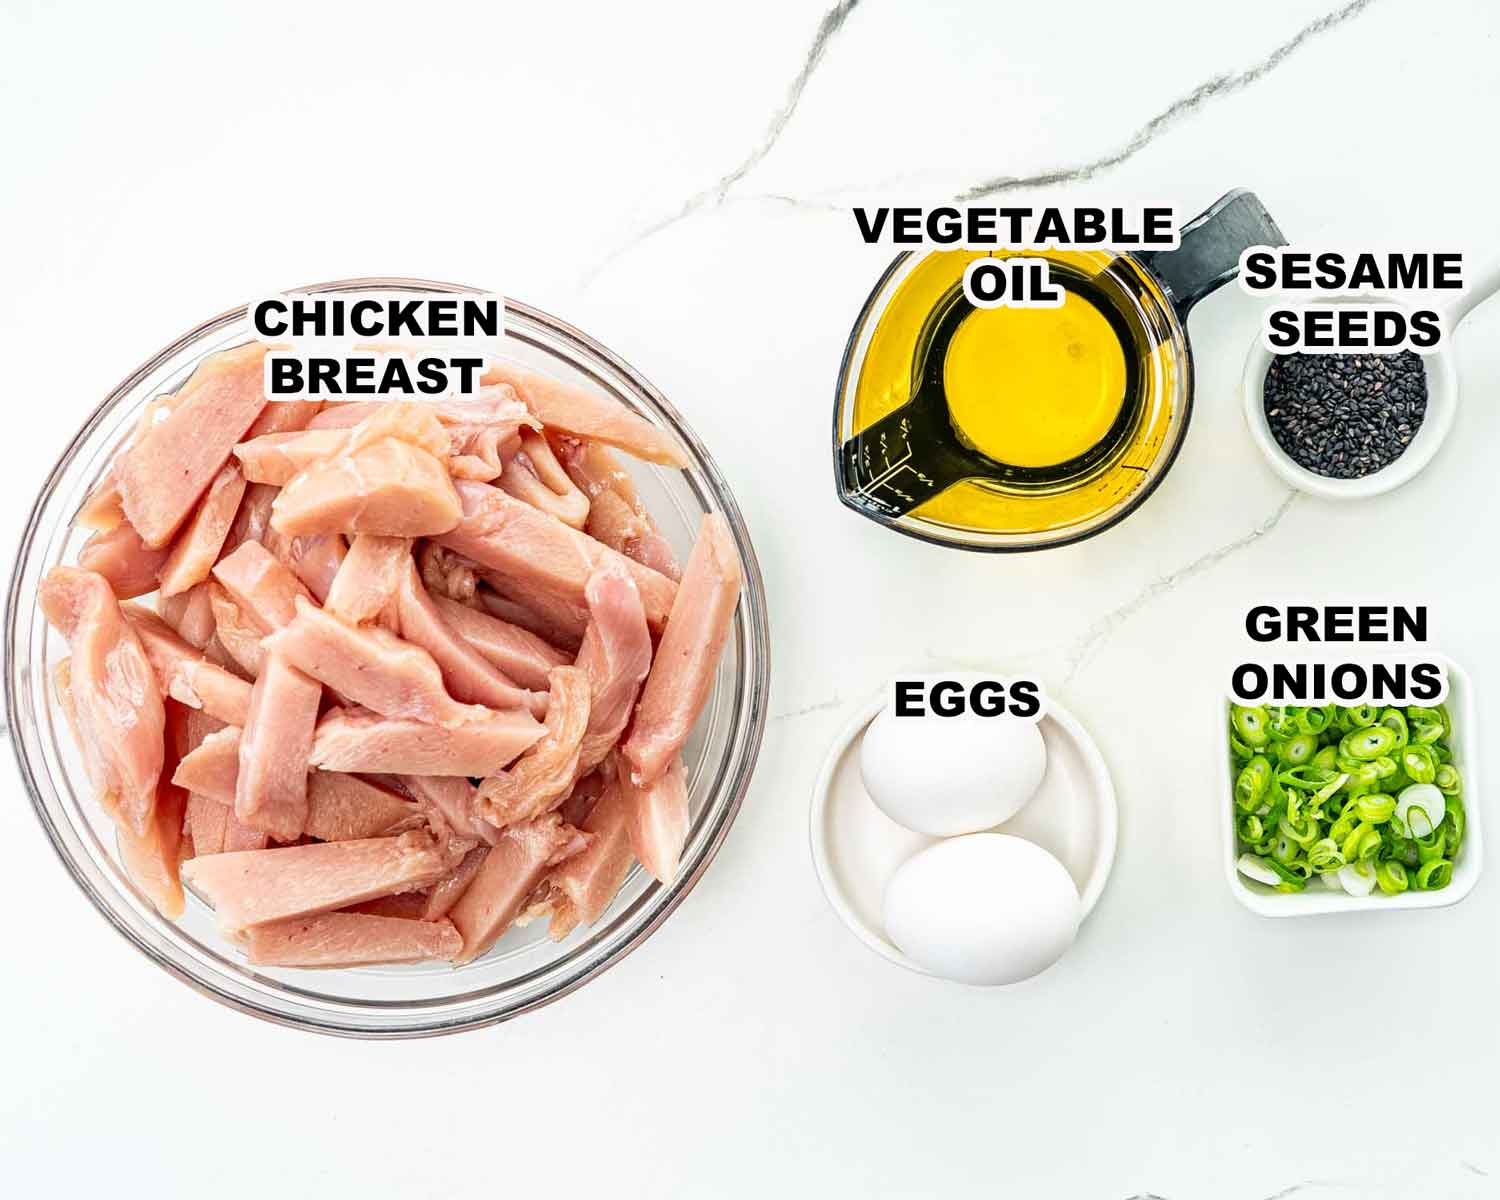
- Chicken Breast: We’re using boneless, skinless chicken breasts, cut into thin, long strips, to make sure the dish is tender and cooks quickly. If you prefer, you could substitute chicken thighs for a juicier texture.
- Eggs: Eggs act as the binding agent for the breading.
- Vegetable Oil: Used for frying the chicken, you can also use canola or sunflower oil.
- Sesame Seeds: These add a crunchy texture and a nutty flavor; however, they are optional, or you can use chopped nuts as a substitute.
- Green Onions: They give a fresh and sharp taste, but they’re optional, or you can use chives as a substitute.
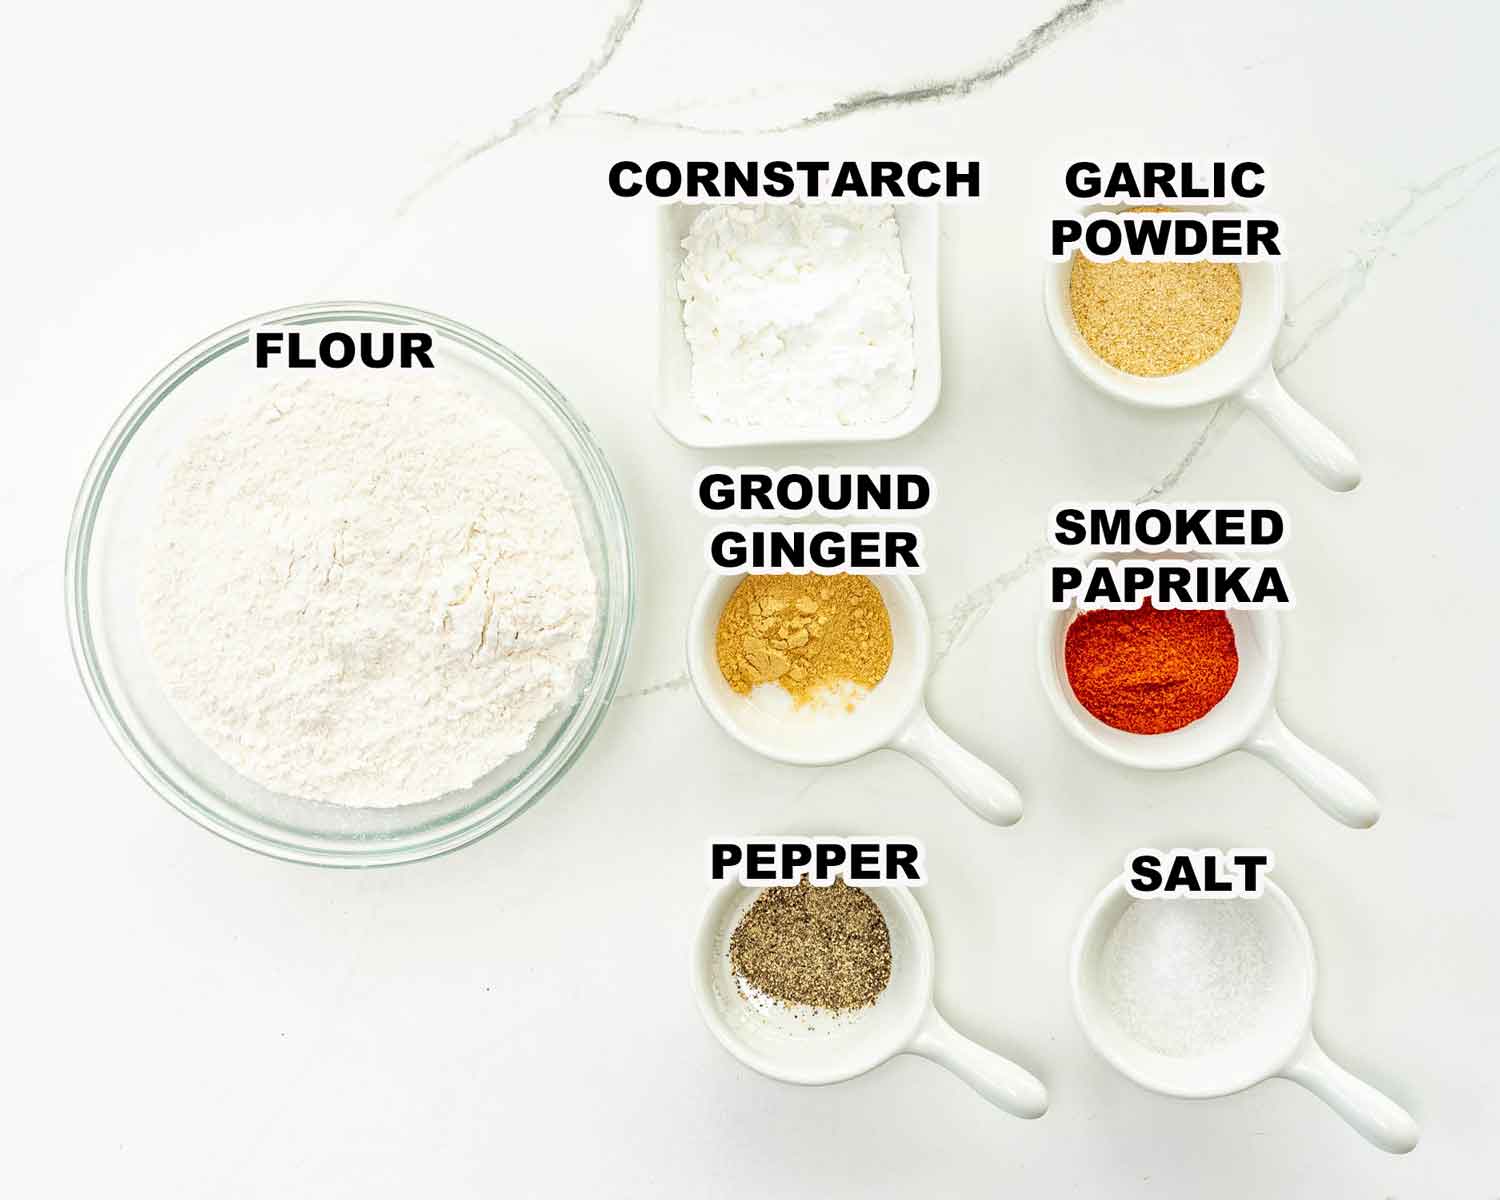
- All-purpose Flour: This is for coating the chicken; you can substitute with gluten-free flour if needed.
- Cornstarch: Mixed with flour for breading, it makes the chicken extra crispy. You can use arrowroot as a substitute.
- Garlic Powder, Ground Ginger, Smoked Paprika, Salt, and Pepper: These spices add depth to the flavor of the breading; feel free to play around with other spices.
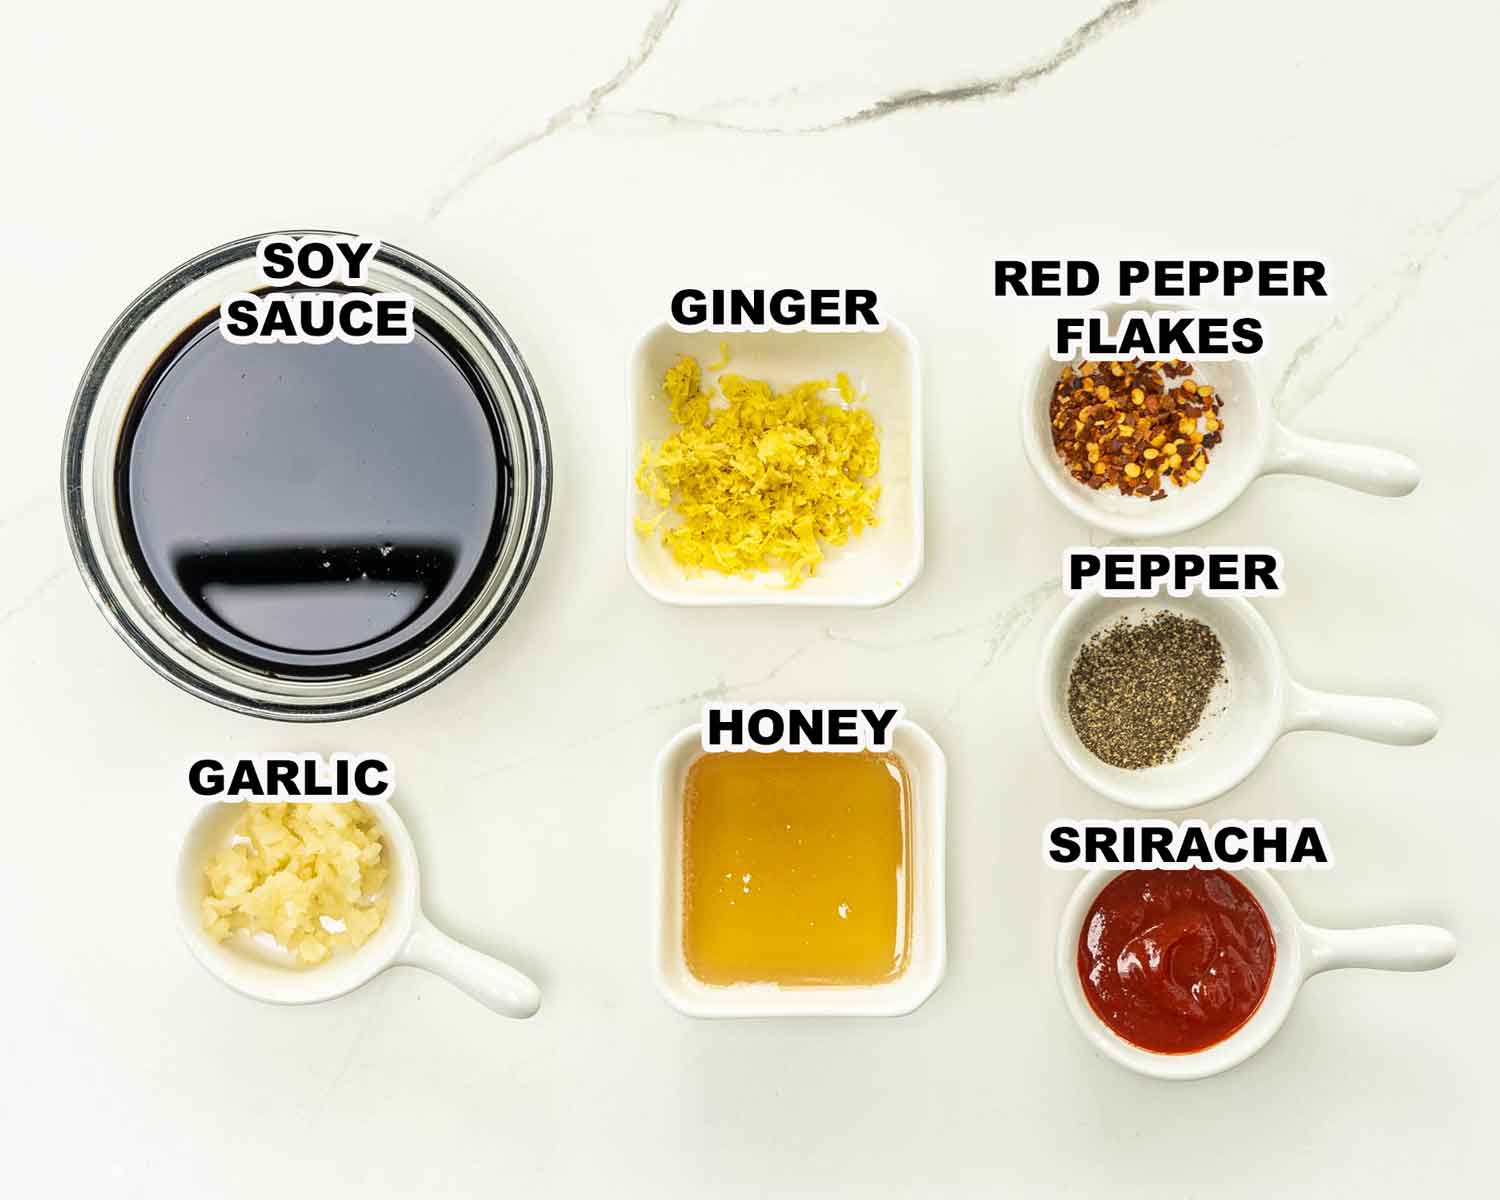
- Red Pepper Flakes: They add a spicy kick to the sauce; adjust to your preference or omit if you prefer less heat.
- Honey: Adds sweetness to balance the sauce. You can use maple syrup or agave nectar as a substitute.
- Soy Sauce: It gives the sauce a salty and umami flavor. You can use tamari or coconut aminos as alternatives.
- Sriracha Sauce: It contributes to the sauce’s spiciness; you can use any hot sauce of your preference or adjust the amount to your liking.
- Fresh Ginger and Garlic: They bring aromatic and flavorful elements to the sauce. While fresh is best, ground ginger and garlic powder are possible alternatives.
- Black Pepper: Adds a bit of heat and flavor to the sauce. If you don’t like black pepper, you can leave it out.
You won’t believe how easy this dish is to whip up! We’ll start with setting up our ingredients and getting our chicken nice and breaded.

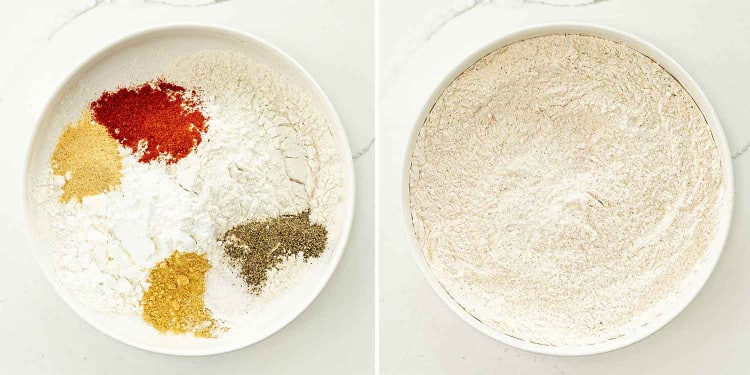
So first, let’s whisk our eggs in one plate and mix up our flour, cornstarch, and all those flavorful spices in another.
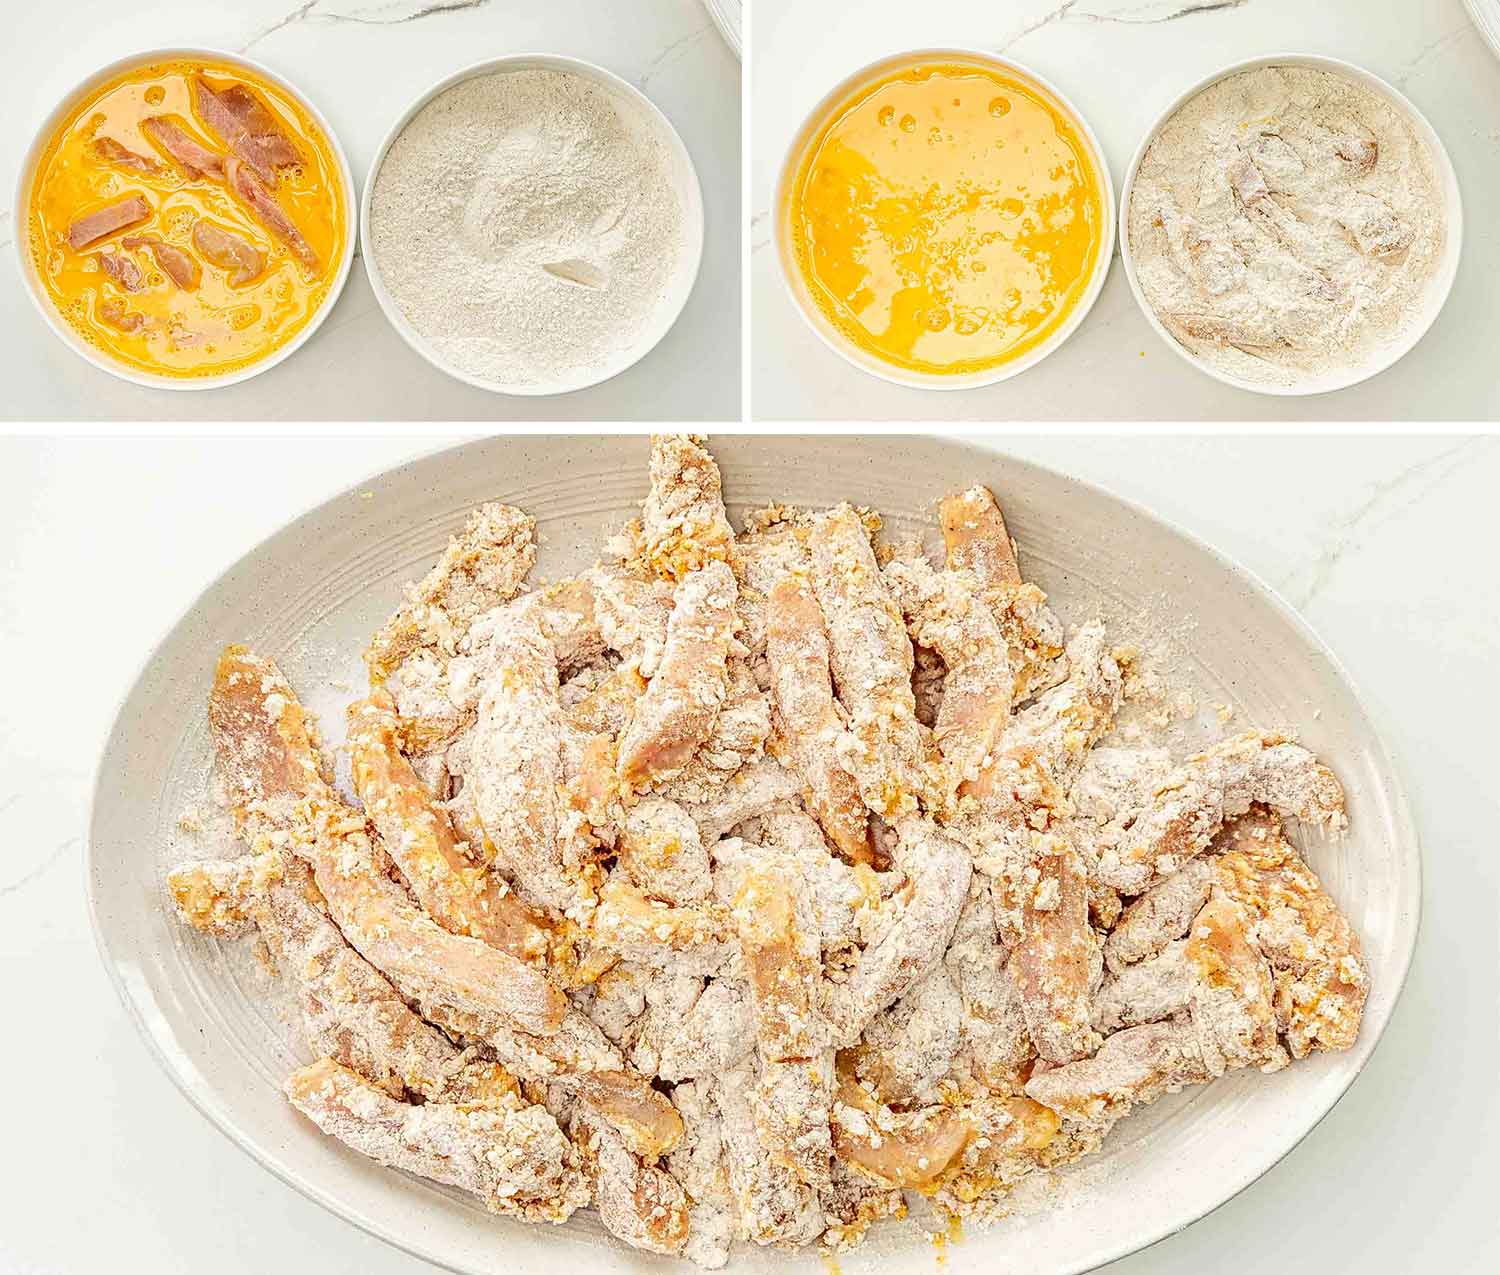
Now, dip those chicken strips in the egg, then give them a good roll in the flour mixture to get them nicely coated.
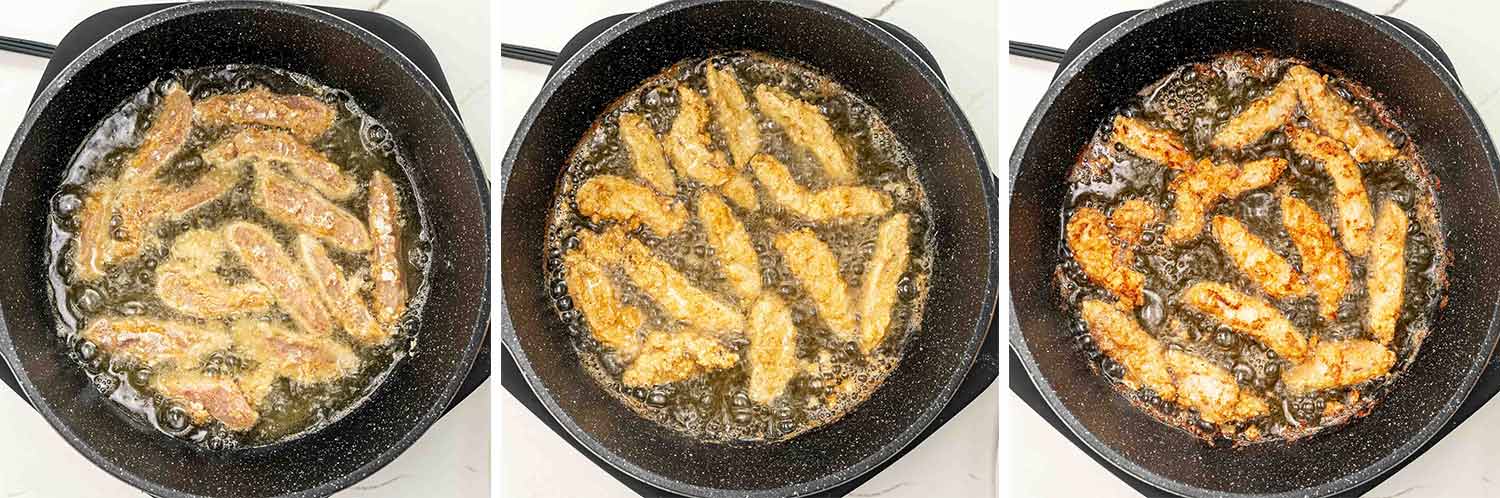
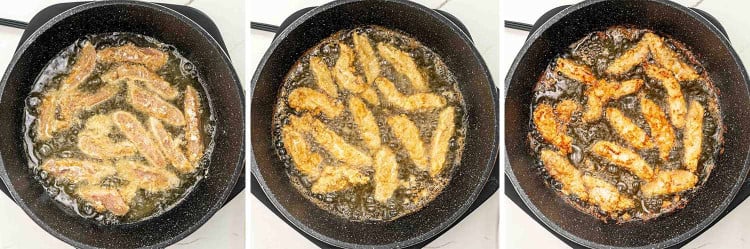
Time to get cooking! Heat up your oil in a deep pan or a Dutch oven. Once it’s hot, pop the chicken in, piece by piece. Fry them until they’re golden brown and the chicken is cooked through, about 3 or 4 minutes each. And of course, let’s do this in batches to avoid overcrowding the pan.

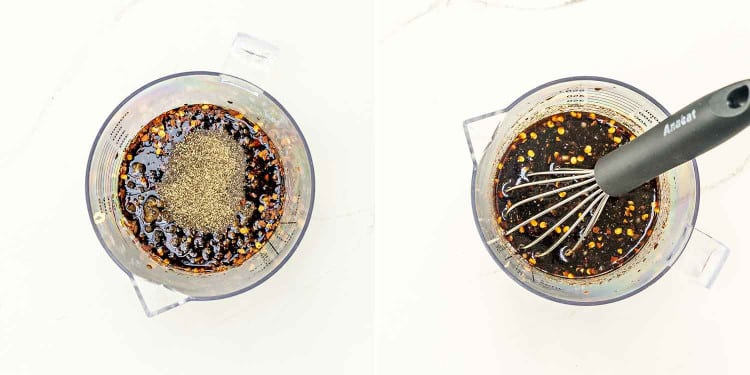
While our chicken is cooking, let’s get that sauce ready. Just whisk together the red pepper flakes, honey, soy sauce, sriracha, fresh ginger, garlic, and pepper.

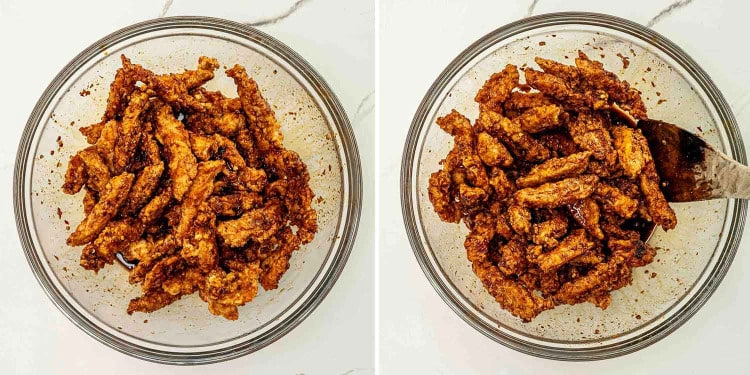
Now for the fun part! Drizzle that delicious sauce over the crispy chicken pieces. Give them a good toss to make sure they’re all coated in that gingery goodness.
And lastly, if you’re feeling it, sprinkle some sesame seeds and chopped green onions on top for an extra burst of flavor and texture.
Frequently Asked Questions
Can I use chicken thighs instead of chicken breast for this recipe?
Absolutely! Chicken thighs can be a juicier and more flavorful alternative. Just make sure to adjust the cooking time as needed since thighs may take a bit longer to cook through.
Can this dish be made gluten-free?
Yes, you can make this dish gluten-free by substituting all-purpose flour with a gluten-free alternative and using a gluten-free soy sauce or tamari.
What can I use instead of sriracha sauce if I don’t have any?
If you don’t have sriracha, you can use any other hot sauce you prefer. However, the flavor might vary slightly, so adjust the quantity to your taste preference.
Can I bake the chicken instead of frying?
Certainly! Baking is a healthier alternative to frying. Arrange the coated chicken pieces on a baking sheet and bake them at 400°F (200°C) until they are golden and crispy, usually around 20-25 minutes.

Expert Tips
- Optimal Oil Temperature: Ensure the oil is hot enough before frying the chicken. The ideal temperature is around 350°F (180°C). If it’s too hot, the outside will brown too quickly before the inside is cooked, and if it’s not hot enough, the chicken will absorb too much oil and become greasy.
- Avoid Overcrowding: Don’t overcrowd the pan when frying the chicken; this can lower the oil temperature and make the chicken pieces stick together. Fry in batches to maintain the optimal temperature and ensure each piece is crispy.
- Use Fresh Ginger: Fresh ginger can make a big difference in flavor. While ground ginger is convenient, using freshly minced ginger will give you a more vibrant and aromatic taste.
- Balancing Flavors: Balance the sweetness and spiciness according to your taste. You can taste the sauce before adding to the chicken and adjust honey and sriracha levels as needed.
- Resting the Coated Chicken: After coating the chicken in the flour mixture, let it sit for a few minutes on a wire rack. This will allow the coating to adhere better, resulting in a crispier texture when fried.
Storage
First, allow any leftovers to cool to room temperature. Once cool, transfer them to an airtight container and refrigerate. You can relish this dish again within 3 to 4 days when stored this way.
You can also freeze it! Just ensure it’s packed in a freezer-safe, airtight container or tightly wrapped in aluminum foil. The frozen ginger chicken can be reheated and enjoyed for up to 3 months. When ready to enjoy again, thaw it in the fridge overnight and reheat to the perfect temperature in the oven or on the stovetop, ensuring it’s piping hot before serving.
Discover More Asian Recipes
- Kung Pao Chicken
- Easy Beef And Broccoli Stir Fry
- Instant Pot General Tso’s Chicken
- Chow Mein
- Chicken Lo Mein
- Sweet And Sour Chicken
- Asian Style Pepper Steak
Before You Begin! If you make this, please leave a review and rating letting us know how you liked this recipe! This helps our business thrive & continue providing free recipes.
Ginger Chicken
Ingredients
- 1½ pound chicken breast (boneless and skinless and cut into thin long strips)
- 2 large eggs
- vegetable oil (for frying)
- 1 tablespoon sesame seeds (optional)
- 2 green onions (chopped, optional)
For chicken breading
- ¾ cup all-purpose flour
- 2 tablespoon cornstarch
- 1 teaspoon garlic powder
- 1 teaspoon ground ginger
- 1 teaspoon smoked paprika
- 1 teaspoon salt (or to taste)
- ½ teaspoon pepper (or to taste)
For Sauce
- ½ teaspoon red pepper flakes
- 2 tablespoon honey
- ½ cup soy sauce (low sodium)
- 1 tablespoon sriracha sauce
- 1 teaspoon fresh ginger (minced)
- 3 cloves garlic (minced)
- ½ teaspoon pepper
Before You Begin! If you make this, please leave a review and rating letting us know how you liked this recipe! This helps our business thrive & continue providing free recipes.
Instructions
- Whisk the eggs in a shallow plate. In another shallow plate whisk together all the breading ingredients.

- Dip the chicken pieces in the egg wash then dredge them through the flour and make sure each piece is fully coated in flour.

- Fill a Dutch oven or a deep frying pan with vegetable oil, about 1½ inches deep and heat. When the oil is hot, ideal temperature is around 350°F (180°C), add chicken to the pan, a few at a time, and fry it for about 3 or 4 minutes until it's golden brown. Make sure the chicken is cooked inside. Repeat this until all the chicken is fried.

- To make the sauce whisk all the sauce ingredients together in a small bowl.
- Drizzle the sauce over the chicken and give them a good toss. Sprinkle with sesame seeds and green onions if preferred.

Notes
- Chicken Preparation: The chicken should be cut into thin and long strips to ensure even cooking.
- Oil Temperature: Maintain an oil temperature of around 350°F (180°C) for optimal frying results.
- Breading Consistency: Ensure each piece of chicken is well-coated with the breading mixture for a crispy texture.
- Sauce Application: Drizzling the sauce over the chicken after frying will keep the exterior crispy.
- Serving Suggestion: This dish is best served immediately while the chicken is crispy and the sauce is fresh.
- Substitution: If you don’t have sriracha sauce, any hot sauce can be a good alternative, but adjust to taste.
Nutrition Information
Notice: Nutrition is auto-calculated for your convenience. Where relevant, we recommend using your own nutrition calculations.

Hi Jo! I love the idea of this recipe, but admit to some trepidation about the sauce. VERY surprised the sauce wasn’t heated, to allow the flavors to meld/marry, and take away the “rawness” of the ginger and garlic.
Call me curious!😁 Thanks!
Hi there! Thanks for your curiosity and interest in the recipe! I understand the concerns about the rawness of ginger and garlic. You can definitely try simmering the sauce for a few minutes if you prefer a more melded flavor profile, and it should work just fine. I hope this addresses your trepidation and that you end up enjoying the dish!
Can you offer directions to cook in an air fryer?
Sure! Preheat your air fryer to 400°F (200°C). Place the chicken strips in a single layer in the air fryer basket. Ensure they are not overcrowded to allow proper air circulation for even cooking. You may need to work in batches, depending on the size of your air fryer. Spray them with cooking spray and cook the chicken strips for about 10-12 minutes, turning them halfway through the cooking time, until they are golden brown and have reached an internal temperature of 165°F (74°C). Make the sauce as directed and drizzle over the chicken. The cooking time might vary depending on the thickness of your chicken strips and the specific model of your air fryer, so keep an eye on them and adjust the cooking time as necessary.
I made this Keto style with Almond flour instead of regular Flour. I also used Truvia instead of honey.Perfect love it!
I finished eating and it was just on the edge of too hot (spicy) but loved the crispness. Will do again with less heat so as not to cover the ginger.
Wanted something different for a change, it’s not a recipe you get in scotland. Loved it, missed out the chilli sauce and used dark soy and it was not too salty. So quick.
Glad you liked it, Arthur!
Way too salty! Use low sodium soya sauce. Nice spice level. Added julienne carrot and onion quickly pan fried and added to sauce
This was amazingly easy and very delicious 😋
This was EXCELLENT! The only change I will make in future is to thicken the sauce slightly. I agree with you Jo…better than store bought! Thank you for sharing this with everyone!
My pleasure, so glad you enjoyed it!
Looks delicious
This dish was easy to make and came out looking beautiful. I would make it again but would either omit the salt in the breading or use low sodium soya sauce in the sauce. Mine was almost inedible because it was so salty!
Thank you for the awesome delicious recipe.
My pleasure!
I love crunchy chicken! And the simplicity amd beauty of your photos never cease to amaze me! You are right, Asian food is not that hard to make at home…just have to have the right ingredients on hand 🙂
Thank you Mila 🙂
Mmmm, I could so go some of these right now! I haven’t made breaded Asian in ages. I had to giggle when I was reading because I go through the same!! I’m cursed on Mondays. In Australia, most restaurants are closed on Mondays – I guess they think no one gets takeout at the beginning of the week. But I seem to always want takeout on a Monday – and I only get it once ever couple of months!!!
So I understand exactly what you mean about having a hankering for a particular takeout. And I bet this IS better than the restaurant version. Check out that sticky sauce!!
Hi, love your blog and recipes! I even have a board on Pinterest dedicated to you! Was wondering……this ginger chicken recipe looks fantastic, but the nutritional info isn’t listed. Since I am on Weight Watchers and Diabetic is it possible to get the nutritional info. I love that you’ve included it in past recipes. Keep up the good work. Donna Divis
Hi Donna,
It’s hard to provide nutritional info on fried food and that’s why I omit it. It all depends on how much oil you use and honestly it’s hard to tell how much actually gets used up. I’ll provide nutritional info for foods that are “healthier” 🙂
I kind of shy away from Asian recipes, but like you said, after a few tries is not that scary, so I just have to give it a try, this dish definitely sounds delicious, and a winner with my family, no crazy ingredients as well, I have to try it 🙂 Pinning!
Hope you do. 🙂